Showing posts with label Graphically Speaking. Show all posts

Wednesday, July 6, 2011

Fourth of July

Hello everyone! Tina Gale here back with another layout for sweet sassy diva design team. This time our challenge was a Fourth of July stars theme. I usually don't like to make my layouts before I have the pictures but because of how busy I've been lately with my husbands chemo treatments I decided to get a quick page together for photos that I'm hoping to receive of my son doing the fireworks for the kids camp that he and my daughter work at. I know I'm not the only one that gets things thrown at them that can put a halt on their creative time so I decided to share how you can put together a really quick layout that still has a wow factor.
I decided I'd try and walk you through my thought process when I design a layout and hopefully it will help some of you. Like I said before I never scrap before I have photos because it never works out for me. My photos are never the right size or their the wrong direction for my mats. I also get inspired by my photos so that is where I usually begin. Obviously that's not the case this time but I did start with what I know I want my photo to be of. My children work at a kids summer camp and my son works the activities. One of his biggest thrills of the summer is getting to set off the big fireworks for them on the 4th so I immediately thought of the great silhouettes on A Child's Year. This little boy riding the rocket was perfect! It reminded me of my son and the thrill he gets doing the firework show so that was where I started.
Next I went in search of paper. I had several different patriotic looking papers but this star background was perfect for my quick layout. Sometimes it's very difficult working with patterned paper that has a finished layout look to it. It can look very flat and uninteresting as well as scare some people to cover certain elements on the background up. The key  is not to be afraid of it but use it to it's full advantage. This paper with the glittery stars and fireworks at the bottom left corner was a perfect backdrop for my layout. It brought a lot of interest to the layout without doing anything else but to really give it the 'wow' factor you don't want to stop there and with your cricut it's easy to step it up a notch.

The next element is always a great title and you don't want to forget to leave a place to journal. I chose a great title from Graphically Speaking cut with red and gray for an extra punch.
For the journalling I decided to use some white cardstock cut in 1/2" widths at various lengths to jot down some quick thoughts. It adds some great design interest to a quick layout.

The next element are your photo mats. I chose this wonderful red with silver star paper cut at 4x6 for my photos and then tied some red, white, and blue bakers twine around it for added dimension and design.
Then to tie everything together and help pull the design in I cut stars out in various sizes from 3/4" - 1 1/4" from Graphically speaking and scattered them around the layout.
I also used my bakers twine again to tie around a couple of the stars for some extra 'wow'.
Recipe for Stars for the Fourth
Paper - American collection from the $1 spot at Target
Airmail Bakers Twine - available here
Cricut Cuts:
Fourth of July 1 1/2" - Graphically Speaking - p. 43 
Stars 3/4" - 1 1/4" - Graphically Speaking - p. 43
Boy on rocket 3 1/2" - A Child's Year p. 46

I hope you enjoyed my layout and find my tips helpful the next time you want to create a quick layout. Be sure to visit me at my blog for more great projects! 

Hugz

Tuesday, June 21, 2011

You & Me

Hello all,  I'm thrilled to be back again with a layout for the sweet sassy diva design team. This week my challenge was to work with the Graphically Speaking cart. I love this cartridge and have used it a lot for my sons photos. It has some great phrases and cuts for teenage boys! I decided to challenge myself and use it for something other than guy stuff and I'm so happy with what I came up with. I bet most would never guess I used GS for this layout at first glance. 

These photos were taken at our church on Valentines Day weekend by friends. We had a fabulous service about marriage and then everyone renewed their wedding vows and had wedding cake after the service. It was such a great time.
I have to tell you about the huge cakes in the background as well. I've donated a cricut to our church's decorating department and all the flowers on the cake was made with it. Remember you can always click on the photos to enlarge them and get a better look. I think they did a fabulous job with their cricut and the George cart!!
A close up of the title. Together did not have a shadow but I needed it to pop off the page so I glued it to a piece of cardstock and then just trimmed around it real quick. I also pop dotted it off the page.
 The border is made from 2 1/2" squares of patterned paper matted with cardstock. I had these fabulous embellishments in my stash that I used to add some bling to the page.
I added yellow rhinestones to the antenna to help make the butterfly pop and pop dotted it off the page. I also added a tiny pink heart to the end of the swirl.
This is the first time I can remember that I did not pen and ink up my cuts but I think it works for this layout.

The sizes of all the cuts are as follows.
me & you - 2"
Together - 3/4"
flower border - pg. 33   1 3/4"
butterfly - pg. 57    2 3/4"

I hope you enjoyed my layout today and stop by my blog to see more wonderful projects.
Hugz
Tina Gale

Saturday, February 12, 2011

On the Go 8 months

The next set of pages I used a lot of really old stuff from my stash. The 8 months is some rub on letters and the Explore sticker is on a chipboard circle.

 For the title I used the Pooh Font cartridge. Another spiral page from  Graphically Speaking for the journaling and the little lamb is a very old hand paper piecing I did when I first started out. I've always loved paper piecing but with  my cricut it's so much faster now!
 Here's a close up of my little lamb. He's so cute!
I know my pages are rather simple but I hope I inspire you to get some of those old photos out and just get them scrapped! Also look through that pile of stash and see what you can use. I know we all have a huge stash and I'm determined to get some of it used up.

Thursday, February 10, 2011

Baby Album 7 months

Here are two more pages of my sons baby album. Not a lot of cuts on these two pages. I did the journal spiral page and the 7 emblem from the Graphically Speaking cart. This cart has been fabulous for this album. There is so much on there. Be sure to check it out if you haven't already.

Friday, September 3, 2010

4 & 5 Months; Baby Album

I did single layouts for months 4 & 5. I must have been busy chasing him and not enough time to snap photos. LOL  

The 4 and star negative are more chipboard pieces as well as the bracket. I used rubons for the pride & Joy and 5 months.

Cricut cuts from:
Graphically Speaking - rolodex card for journaling.

Tuesday, August 31, 2010

3 Months; Baby Album

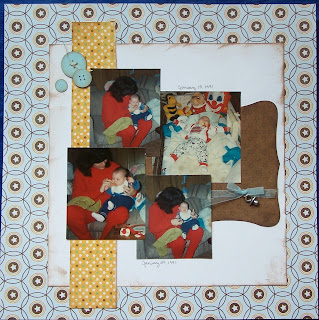
I have used lots of sketches to make this album go together quickly as well. I keep a binder full of sketches to refer to when I need a little inspiration. I sorted all my photos and pick the ones I want to use then look through my sketches then it's just a matter of picking papers. Since I'm using a line from My Minds Eye the work of matching papers is done for me. I just pull out two or three for the layout I'm working on and wam bam it's done! Great way to get caught up quickly.

I used a couple more of the metal charms and ribbon to tie these pages together.

Cricut cuts from:
Plantin Schoolbook - Scalloped Border
Graphically Speaking - Buttons, 3 and circle border

Sunday, August 29, 2010

Month 2; Baby Album

This set of pages I had a hard time keeping with my paper theme since it was Baby's 1st Christmas. Everything in me wanted to break away and pull out Christmas papers but I'm glad I didn't. I used another journaling stamp from Michael's $1 spot. The star is the negative chipboard from the star on the first page and the two is a chipboard piece from my stash as well. Everything is else is my cricut. I love my cricut. It has made this album such a cinch to pull together and such fun! I added a lil metal rocking horse charm and some ABC block buttons to the layouts along with more ribbon.


Cricut cuts from:
Pooh Font - Baby's 1st Christmas
Graphically Speaking - notepad journaling and circle behind the two

Friday, August 27, 2010

1 Month; Baby Album Continues

I'm thoroughly enjoying looking through all the old baby photos. I just don't know where the time has gone.

Baby Boy is buttons from Hobby Lobby.
The pearl accents is from Viva Decor Pearl Pen. This is the first time I've used them and I'm really liking this new product. The look just like pearl accents but a lot more economical and they stay put.


Cricut cuts from:
Graphically Speaking - 01, circle border, Shhh, and Notepad

Tuesday, August 24, 2010

Baby's 1st Year Album

My goal this summer was to put together my son's 1st year album. Of course he turns 20 in another month so I don't think I started a minute too soon. LOL I have 24 years of photos to scrap and I mostly work on current photos while the memory is fresh and I can do more meaningful journaling. Unfortunately that means my children do not have albums completed. Gasp, the thought of being so far behind. I confess all of this to you so you don't feel bad about how far behind you are. LOL

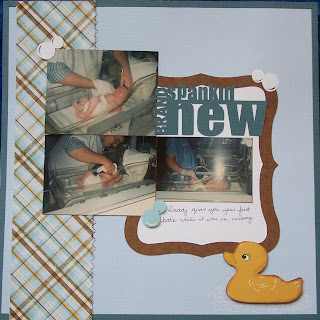
I used several cartridges and my cricut throughout the album and will try my best to post where each cut comes from. The paper is from My Minds Eye. I fell in love with this line and it made the album go together really quickly and flow together nicely. I'll be posting the pages throught the next couple of weeks so stay tuned for more.
This is the title page. The star is a chipboard star from my stash as well as the sticker and round frame on it.

Cricut cuts from:

Journaling Tag
A Child's Year - Teddy Bear, Baby boy, Duck, Bubbles
Graphically Speaking - Brand Spankin New, Journaling Mat
Stork
Wild Card - Buttons
Create a Critter - Moon

Wednesday, February 3, 2010

The White Stuff


Here's another layout from pictures way back although we've had this much snow this winter. I'm really ready for Spring. As you can tell from these photos compared to the photos I posted recently their daddy still pulled their sled but with a bicycle instead of the 4 wheeler. LOL

The title was cut from the Graphically Speaking cart. I glittered the letters and added a couple of snowflake brads onto the mat.
This little snowman and snowflakes was hand paper pieced long before my cricut and has been waiting to be used. It made a perfect journal box for this page.
I hope you're staying warm this winter and getting lots of scrapping done.
Have a blessed day!