Showing posts with label Cuttlebug. Show all posts

Friday, August 18, 2017

Good Times (The ScrapRoom)

Some links may be affiliate links. It doesn't cost you anymore to use them but helps support this blog and youtube channel which I greatly appreciate!!


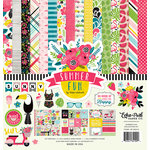
It's time for another Freaky Fast Friday challenge and I couldn't resist playing along. I'm using Echo Parks Summer Fun collection in this months ScrapRoom Flavor of the Month kit.

Here's a look at the full process and how I decide which papers to cut what size.
Good Times Process Video


Supplies used:


Hugz
TinaGale

Monday, February 1, 2016

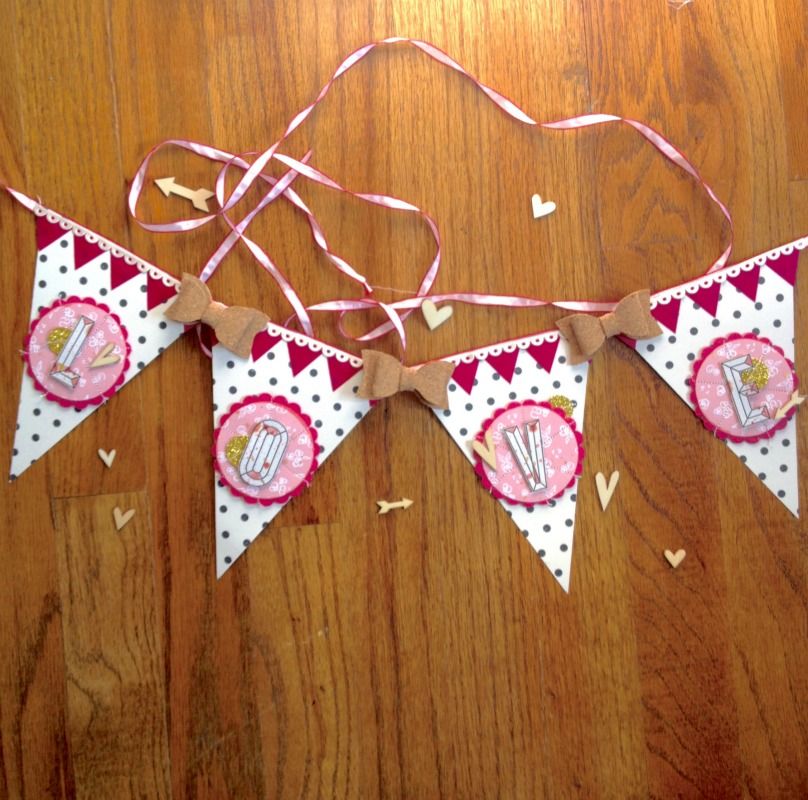
Showered with Love (Paper Issues & the Ribbon Resource)


I'm so excited to share a project I made  with The Ribbon Resource, May Arts  and Paper Issues.
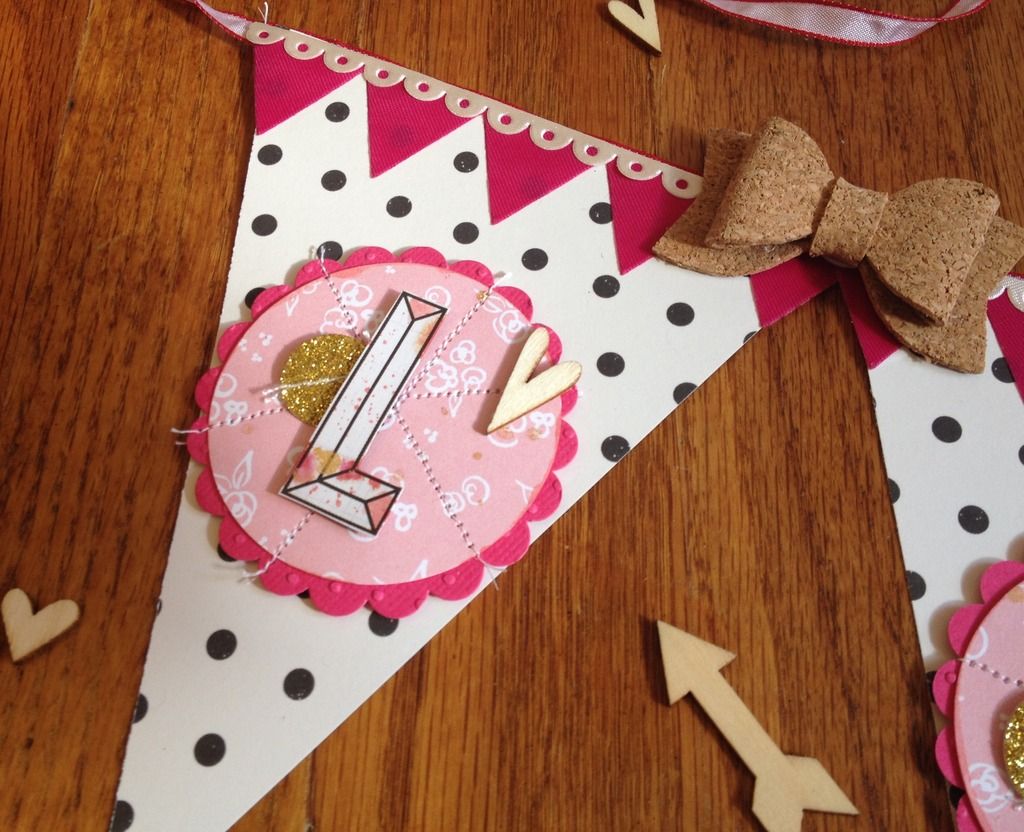
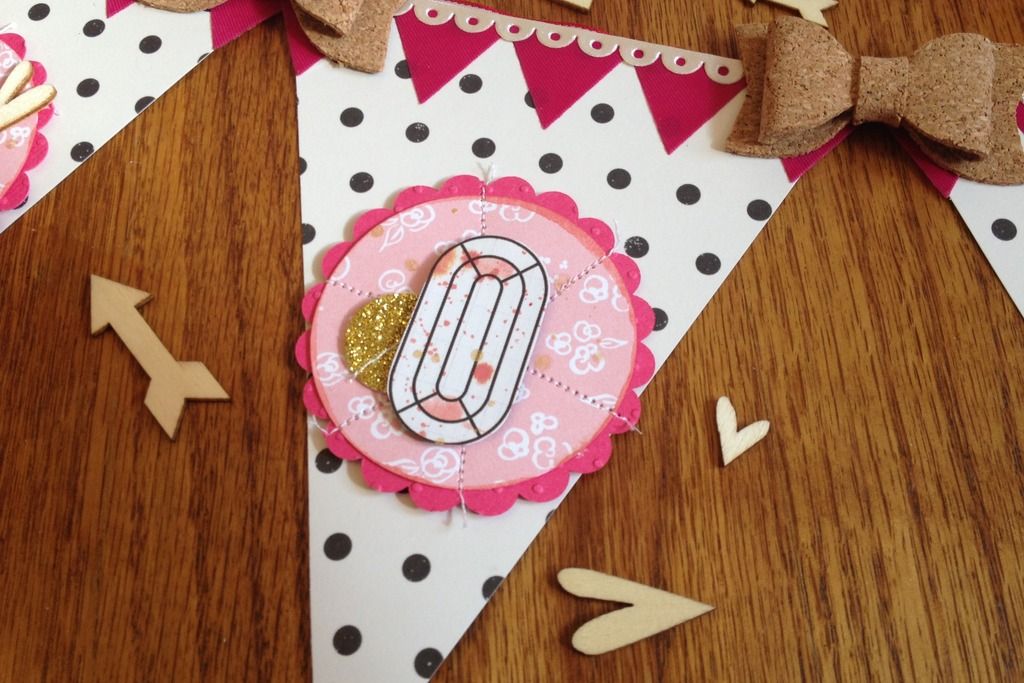
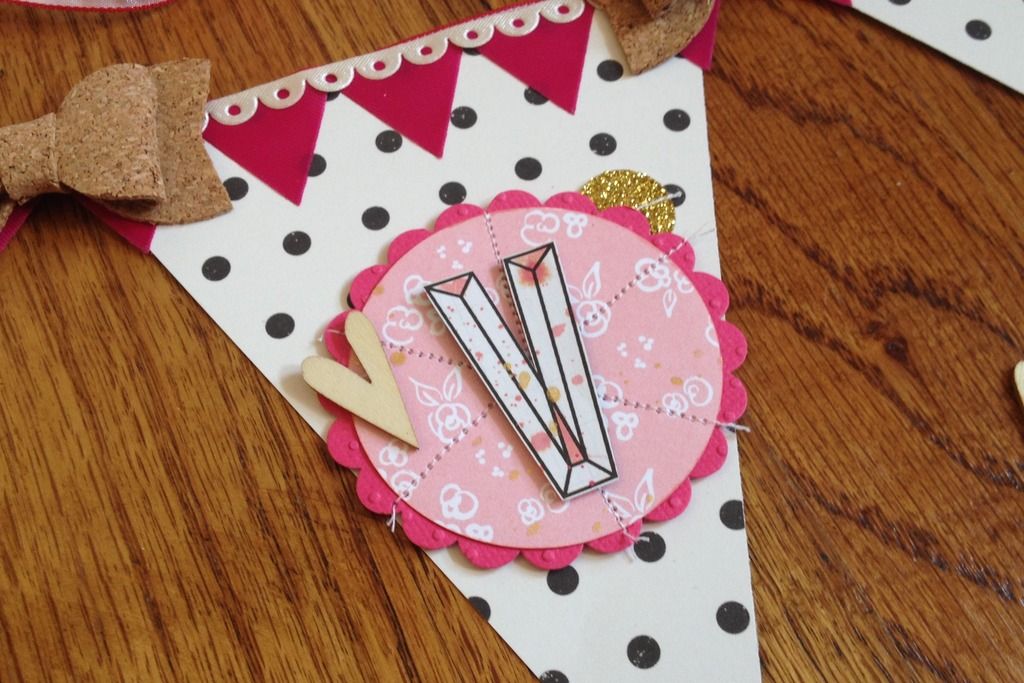
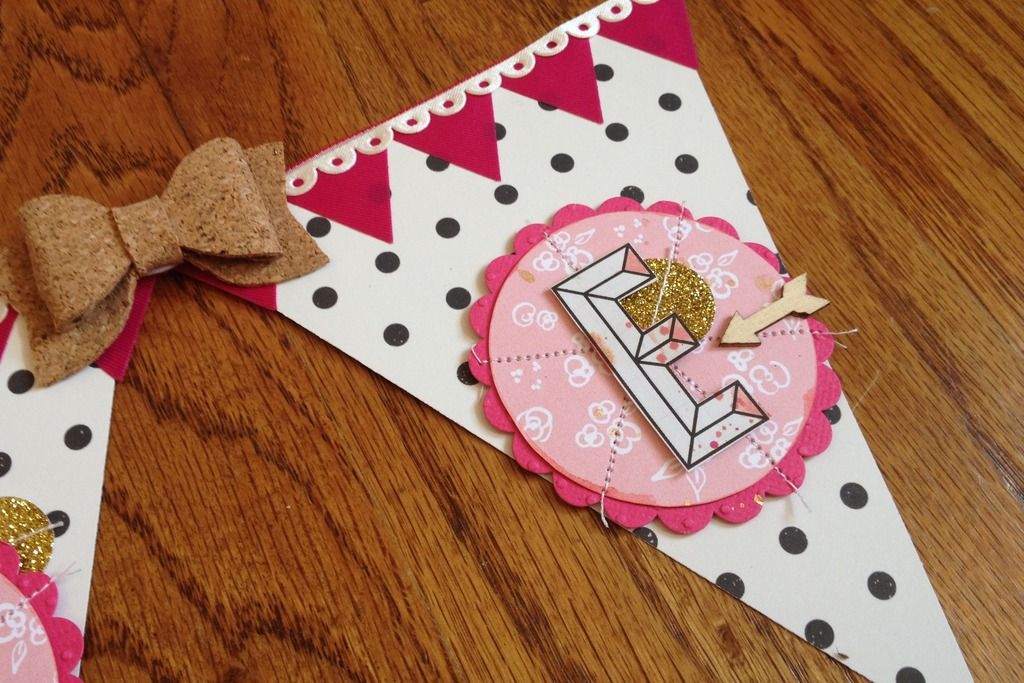
The ribbons were all so gorgeous it was hard to decide what to work with but the beautiful banner ribbon gave me my inspiration. I decided to create a Valentines banner to send to my daughter to decorate her room. I ended up using 4 different ribbons from the Ribbon Resource and they're all so beautiful!


Here's a look at the process


If you're reading in email click the link below to watch 

And some close ups


Check out all the other Showered with Love projects created by the Paper Issues Design Team. http://paperissues.blogspot.com/2016/02/new-issue-showered-with-love-round-1.html


Join us on the {Friends & Fans} Facebook group to play along. You could win a $25 gift card to the Ribbon Resource store.


Use code TinaGale to save 20% off your entire Paper Issues order. Lots of new products coming in right now but they're going fast.
Supplies used:
Shimelle
Elle's Studio
Maggie Holmes Shine
May Arts Ribbon
Jen Hadfield Homemade Dies
TH fire brick, aged mahogany distress ink
Heidi Swapp Gold color shine
Dear lizzy cork bows
foam tape
sewing machine
Cuttlebug Swiss dot embossing folder


Sponsored by: May Arts/The Ribbon Resource
Prize: $25 gift card to The Ribbon Resource store
and


Hugz
TinaGale

Friday, May 18, 2012

Disney Tiki Room

Tina here with another post for sweetsassydiva Design Team. Our challenge this week is to use 3 carts or more. Well that's never a problem for me. LOL

I'm still working on my disney albums and had these photos from the Tiki room up next to work on. I went looking for some birds and tiki theme stuff and began creating.


This bird came from the Life's a Beach cart. He looks black here but he really is blue. ;o) The flowers are from Pack Your Bags.


This little guy is from Birthday Bash. I used my cuttlebug to add some interest to the cuts and then my usual pen work.


I hope you enjoy my layout and visit me again for more great Disney layouts!
supplies:
Cricut
Pack Your Bags cart
Birthday Bash cart
Life's a Beach cart
Cuttlebug
Embossing Folders

Hugz

Tuesday, August 2, 2011

Keep on Truckin

Hello everyone! I wanted to give a quick update for everyone that's been following my husbands and I journey with lymphoma. June was particularly rough and July started that way. Hubby developed a blood clot in his jugular vein and arm. His blood pressure was dropping dangerously low and he even fell a couple of times bloodying his nose pretty good from lightheadedness. They have him on blood thinners. It's actually quite comical because dh passes out at the site of needles and I'm as queazy as they get around blood. But guess who gets to do his shots everyday in his belly? You guessed it! ME!! We have a pact and so far it's working well. He doesn't look at me or the needle and I don't look at him, only the needle and his belly. We are quite the pair! His blood counts are better so we're praying to only have to do one more week of the shots. Then he will only have to take the pills.

One of the nurses told us that they use cancer patients in movies to portray holocaust victims. After watching him go through all this I believe it. He lost down to 140 pounds. This last week he's made a huge improvement and is  gaining a little weight and his strength back. He has done great with chemo and feels great during and right after them. No side effects at all other than tired. We praise God for this. He gets his next CT scan Friday to see the effect chemo and prayers have had on the cancer. We are believing for great results. He's already the talk of the office for how much he has improved just in the last two weeks.

So that brings me to the card I have to share today. A very special friend knew how important it was for hubby to be drinking Ensure at least twice a day to get his strength back and gain some weight. She also knew how expensive it was so blessed us with a shipment of two cases! It was a true blessing and very appreciated. This little or should I say big guy caught my eye the minute I bought Campin Critters and I've wanted to make him ever since. I decided this was perfect to show my appreciation at helping me get my guy back to his go gettum self. He loves to go to Colorado and 4 wheel along with hike the mountains so this is to him getting back to all of that really soon.

I cut and chalked him up like I always do. The trees were run through my cuttlebug with the dvine swirl folder. I couldn't resist using some twine to lace up his boots. I think they're too cute!! Um handsome I mean. LOL
Details
Hiker - Campin Critters 3 1/2"
Trees - Campin Critters 2" Real Dial size
Cuttlebug Swirl Embossing Folder
Cuttlebug
Twine
Ink - Cat Eye Chalk Inks

I hope you enjoyed my card today and thank you again to all the ones that have sent your thoughts and prayers to us during this time.
Hugz
Tina Gale

Thursday, March 31, 2011

My Cricut Station

I'm constantly updating and moving things around in my studio but one thing I'm pretty happy with is my Cricut Station. The challenge this month on the Circle Magazine was to show our storage so I thought I'd share my cricut work space. I hope it will inspire you in your organizing adventure.

This is the bulk of my cricut station. I don't keep my carts in the boxes as you'll see in a pic further down but I do like to keep my newest ones next to my machine until I use them. It helps keep me from being a collector instead of a scrapbooker. ;o)


I'll start below with my cuttlebug area. All of the shelving is jet max cubes from Michaels.  This one holds my cuttlebug and my folders are in the drawer next to it. Makes it very handy!

 I have a video you can check out <> where I show how I cut the packaging down for dividers. I sort them alphabetically and my plates are stored to the front of the drawer. I used to have them in a crate on top of my shelves which you can see in the video and that worked great but now that I have more this little shelf with drawer makes it handy and attractive while saving my counter top for other things.


The new Cricut Everyday cart had this adorable bug and lettering that I cut out of vinyl to put on the drawer. Too cute!!
 To the right of this is where I store my cartridges, handbooks, and overlays. I made little folder pockets to hold the handbook and overlay. Next to them on the size I store the actual cartridge. The pink bag to the back holds my cricut markers and extra blades. I still need to get my label maker out and label all of them and the drawer fronts. Organizing is never finished it seems.
 Again I used the Cricut Everyday cart to cut these cute little cartridges out to decorate the front on the drawers. I added stickles to the antennas. Gotta have my bling!!

 On the end of my cabines I have one of the little plastic hooks you can buy from Wal-Mart or other store. It holds all of my mats for the Expression. It works perfect! My mats are always within easy reach.
Last but not least by any means is my Pink E. It sits center stage and gets used almost daily. I pull it to the front of the cabinet and it has plenty of room for the mat to clear. I love my studio and my lil cricut station. I hope it's given you ideas for your own space whether it be big or small. My next organizing feat is to set up my new Imagine Station! I just got it but I know I want to get it all organized as well so I can begin to use it daily as well!

Have a great day and as always I love to hear your feedback. 
Hugz
tina


Tuesday, February 15, 2011

Love Bug

This is my daughters Valentine Card. All the cuts are from Create a Critter. I have been giving this cartridge a workout lately. I'm making card kits for the Dallas Stampede and have used a ton of cuts from this cart. I'll be sharing them next month after the Stampede so you'll have to wait to see all the fabulous cards I'm making.


Hope you enjoy it and leave me a note about what you think. Drop me a note if you'll be in Dallas as well. I'd love to meet you.
Hugz
tina

Thursday, May 27, 2010

Happy Birthday Cupcake Tilda

Hello everyone! I've been wanting to make a shaped easle card and finally got one done thanks to Magnolia Down Under's challenge. I designed it on my Gypsy and the Doodlecharm cart.

The icing is embossed with my cuttlebug and the Dvine Swirl folder. I wanted to recreate the pleated look of a cupcake bottom so I used the distressed stripe folder for it. I think it turned out fabulous. Of course you have to have some bling so I used stickles on all the swirls.
I colored Dinner Tilda with my copics and sat her on a piece of twill ribbon from Lil Davis Designs.
The Happy Birthday is a Studio G wood rubber stamp from the $1 Michaels bin. All the swirls were a perfect match for the swirls on the cupcake to tie it altogether.

I hope you enjoy my card and leave me a comment. I'm entering this in the Magnolia Down Under Challenge - make a shaped card. Sun May 30
Lil Red Wagon - birthday theme
Sew Many Challenges - Anything Goes by Thursday June 3
Hugz
Tina

Monday, March 29, 2010

Easter Bunny Card

This is a quick card I put together this morning. The bunny is a digital stamp from Bugaboo Stmaps and colored with my copic markers.

The egg is cut from Doodlecharms and run through the cuttlebug with the Divine Swirl plate and then I ran SU white ink across the top. The ink and jewels are from my stash.

I'm entering this card with the following challenges. Be sure to check all these blogs out for great inspiration and enter a challenge or two yourself.

Totally Paper Crafts Challenge 9 - Pink and Green by March 31
Colour Create Challenge - Choice of pastels and optional Easter theme by April  7
Cuttlebug Spot - Pink and Green by March 31
Critter Sketch Challenge Blog Hop- Sketch and jewels by March 30
Polycraft Challenge - 4 x Papers, 3 x Embellishments, 2 x Ribbon/Lace and 1 x Image. by Sunday April 4
Stampin For the Weekend - Easter by April 1
Paper Play - Easter until March 31

Thursday, February 25, 2010

Spring Is In the Air


Or at least I keep telling myself that.  Twenty-three more days and good bye winter! I am so ready for spring and all the snowy yucky cold to be gone.

Today I thought I'd share another Digi Stamp from Treasure Box Designs. This little chick I did with colored pencils and a few Stampin Up markers.

The purple background was run through the Cuttlebug with the Swiss Dots folder and then I rubbed across the top with the white SU ink pad. It gives a great effect to your embossing folders.

I hope you don't mind my little detour from the cricut for a while. I'm really enjoying coloring these images. Like I said before it is totally relaxing.

Have a blessed day

Tuesday, September 29, 2009

Let It Snow Card


I made this adorable card for the blog hop challenge at Peachykeenstamps.
The snowman is a stamp I had. I used red flocking for his hat and applied glitter to his body then added stickles for his buttons and nose. 
The background is the Cuttlebug snowflake embossing template. I rubbed blue ink onto it and then ran through the cuttlebug. I just love this effect!


I pop dotted him up to add dimension. The circle and scalloped circle were cut using Winter Woodland and my cricut.


The Let it snow is a $1 stamp from Michaels and the mittens are some buttons I cut the shank off of and glued on. I think they're the perfect touch.
I hope you enjoy and as always I love to hear your comments.
Have a blessed day
Tina 

Thursday, September 24, 2009

Winter Woodland Embossed Card


Oh I had such fun with this card! I did the challenge from the cuttlebug challenge blog. I have never used ink on my embossing folders but that was the challenge and I have to say it was fun, fun, fun. I almost couldn't stop.

For this card I used the snowflake 1 cut from pg 32 of the Winter Woodland Cart. I cut it at 2 1/2" and did the 3 layers in different colors. I added a snowflake eyelet to the center and dew drops.


I rubbed a light blue dye ink onto my Snowflakes embossing folder then put my paper in and ran it through the Cuttlebug. What a fun effect! I'm so glad I tried this.

As always I love to hear your comments and you should try this too. It's addicting.

Have a blessed day

Tina

Friday, September 11, 2009

A Childs Year card


I just received A Childs Year cart and had to try it out. This is a really quick card I put together.


I used the apple silhouette cut and the button embossing folder from the Just My Type set.


Hope you enjoy


Have a blessed day

Saturday, September 5, 2009

Organizing Cuttlebug Folders Video Episode 7

Here's my quick, cheap, easy way to organize my cuttlebug folders. I forgot to add in the video that I wrote the names on the embossing folder with a sharpie as well.
Hope you enjoy and as always I love to hear your comments.

Thursday, April 23, 2009

Thank You Cards


First I have to apologize for not posting in so long. I have scrapped a little bit but mostly I've been preparing for my son's graduation. These are some Thank You cards I made for him to send out. I apologize for the photos. I used my daughter's camera and it just doesn't have the pixels for close ups.

You can't see it but the top black piece was embossed with the cuttlebug Thank You embossing plate. I used the JustRite Monogram Stamp for the medallion. Very simple and clean cut but represents my son's personality well.

I hope you have a scrappy day and remember to leave a comment. I love hearing from you.
Tina