Showing posts with label Copic. Show all posts

Tuesday, February 15, 2011

Tilda needs a Hug

This is the card I made hubby for Valentines Day. She is Tilda wants a hug from the Magnolia Collection. She actually had holly tied on her pony tails but I tied pink tiny bows to put over them. The banner is cut with my cricut and Birthday Bash. I spray glittered and inked it to add character and depth. I printed the I and U on the computer. The ric rac was from my stash of trim my mother gave me from her sewing stuff.


I think she turned out gorgeous and hubby loved her pink and all because it reminds him of me. lol
I'm entering it in the following challenges. valentines, Love, and Pink seemed to be popular for challenges so I found several to enter. Thanks for looking.

Cricut Circle Monthly Challenge - banners

Tuesday, February 1, 2011

Mini Tilda's

One of my lovely swap friends sent me some mini Tilda's stamped so I could try them out. I was really intimidated at first because they were so small but in the end I found out they're very quick to do up. I did these one night while watching  a show with hubby. 
I'm sorry the photos are so bad. You can click on them to enlarge them if you can't see them well enough. I really need to find a new camera I think. The pictures just keep getting fuzzier.
 I added some sparkle to these two Angel Tilda's wings and halo. I can't wait to make them up on a tag or card.
 I used the same sparkle for bling on this Mermaid Tilda. It was such fun to color  her fin. I just went with the lightest colors I had and went from red to blue working my way through the color wheel. I haven't decided what I'm going to do with her yet.
Well I hope you enjoyed my peek into some of the coloring I've done lately. Hopefully you'll see them made into projects soon. lol
Hugz
Tina

Wednesday, January 26, 2011

Bildmalarna Cafe Mimosa

I couldn't wait to color up my first Bildmalarna. A group of us ladies on the cricut message boards do a magnolia Stamp Buy & Swap and it was suggested to do the same with the Bildmalarna stamps. I couldn't resist.
She's Cafe Mimosa and I made her up for a birthday card for my mother's 70'th birthday. She loves to quilt and sew so I chose some Cosmo Cricket paper with stitching and some lace that she had given me. I think it turned out perfect for her.
 Here's a close up of the image. I aded stickles to her bow and buttons and her whipped topping. The flowers were a gift from one of the ladies that participates in my image swaps. I added stickles to the outer petals for some extra bling.
I hope you enjoy and let me know what you think of my first Bildmalarna.
I've entered this cutie in the Bildmalarna Blog Pink Challenge
Hugz
Tina

Tuesday, October 5, 2010

Wicked Tilda

I made very special cards for my kids birthday cards this year. They have been wanting to see the Broadway Show Wicked and we surprised them with tickets! I couldn't resist using my Tilda's as Glenda and Elphaba.
I used Spellcaster Tilda as Glenda for the front of my card. I colored her with my copics and blinged her up with a glitter pen and rhinestones. The edge was punched with an EK Success border punch that I received from one of my awesome swap friends.

Here's a close up of Miss Glenda the Good Witch.

 On the inside I used Witch Tilda as Elphaba the Wicked Witch of the West. I used a papertrey ink stamp for the sentiment using versamark and then used green embossing powder.  The Wicked was cut with my cricut and Storybook.
And here's a close up of Elphaba. I was a little afraid to try and make her flesh green but I think it turned out fabulous! I hope you enjoy my little spurt of creativity with my Tilda's. My kids were definitely surprised and we're all excited to see the play next month.

I'm entering this in the Just Magnolia challenge which is Anything Goes.
Hugs
Tina

Tuesday, July 20, 2010

Organizing Shelf for my Inks

First I have to apologize for neglecting my blog lately. I really thought I would have tons of time this summer with both kids working but they still seem to rule most of my days. LOL I wouldn't have it any other way though. I love my kiddos and miss them terribly. My sister also found out she has advanced stages of colon cancer. She's in the hospital and my mom has been staying with her. I really worry about my mom because she's diabetic and just had several surgeries to open blockage to her heart. They're an hour away but I try to take dinner to my mom and make sure she's taking care of herself. Well enough about me let's get on to the project for today!
I saw this shelf made out of foam board a while back and thought it was the coolest thing. Well I finally picked up some foam board and tried it. I love it! It works fabulous for all my inks including my copic markers. It is a lil shallow for the markers so I'm going to make a modified version to sit along side it for all my markers. Ok, I don't have all that many now but give me time. LOL

I have my SU pads on the far right and then my Memento and finally my Distress inks. The first I put slanted shelves in to hold my Copics and I have my versamark in the bottom right corner. My cat eye inks are on top along with some stickles and other tools I use often. This whole project cost me $2, can you believe it?! My husband was really skeptical at first because of it being foam board but it really is quite sturdy and plenty durable for inks. Now that he's seen it all set up he thinks I'm a genius for doing it for $2. LOL

The website that I got the pattern from is http://RebelInker.blogspot.com
She has done a lot of work and put an entire pattern together for it. Be sure to thank her if you download and use her pattern. She rocks!!

And if you try it be sure to let me know. I would love to see it!

Hugz
Tina

Tuesday, May 11, 2010

Q & A What kind of paper to use with my copics and Where can I buy it?

Another question that I get a lot is what kind of paper do I use and then it becomes where can I buy it for the best price.
For me I wasn't big into stamping so when I started I used Georgia Pacific paper that you can get at Wal-Mart or Sams. It's very inexpensive and works ok. It's completely fine if you're using any kind of colored pencil. The problem begins when you use markers. If you get to much moisture going it will begin to fuzz up and put a hole in your paper. That is not good when you've worked so hard on an image to have it ruined when you're almost done. So all of that to say if you're just starting out and you don't know if you'll be doing much it's fine to practice on and get going but I do have to warn you that you will be more frustrated using it than the papers that we're going to discuss next.

Neenah Smooth 80# cardstock is what I tried next. It's a little more expensive but the quality is worth it and really let's face it for 1/4 sheet of paper we're only talking pennies so take my advise and invest in better paper. It's acid free and solar white which means your colors stay bright and vivid. You'll thank yourself in the end. You can purchase Neenah at the following websites plus many more I'm sure-
7kidscollegefund
Scrapyland
StampingScrapping

I've colored on Papertrey Ink and I really like it as well.

Gina K is the heaviest of them all at 120#. I'm using it as of right now and I have to admit I'm having a bit of a learning curve with it. It was a very smooth almost wax like finish to it and if you use to much marker without letting it soak in it can smear. If you're cutting out any intricate images you have to remember it is quite thick and will be a little more difficult. I'm going to order the 80# next and test it. I have heard from others that use it and like it.

Prism Simply Smooth and Bazzil's new Coconut Cream cardstock can be found at many LSS and is said to be a good option but I've not tried it.

Now the question is what are some of the benefits of investing in quality cardstock.
#1 Money - For me I learned very quickly when I had so much bleeding that I cleaned up with my colorless blender and needed to buy a refill within the first month of getting into my copics. The small investment in quality paper is much cheaper than buying colorless blender.
#2 Time - I colored my images so much faster because the blending was almost effortless and I wasn't spending time cleaning up edges.
#3 Quality - My images look so much better. Like I said in the last point the blending is smoother and a better end looking product.
#4 If you want to color directly on a card and not mat it you can do this on the GinaK 120#. It does not bleed through to the back.

One other note about paper is one not to use. I love Stampin Up paper but it is said to have a coating that will ruin your copic markers so if you're coloring with copics I would warn not to use your SU paper.

Those are just a few of my plusses. I would love to hear about any other papers you've tried or experiences you've had with any of these papers. This is simply my .02 and not the Bible by any means. ;o)

Tuesday, April 27, 2010

Midsummer Tilda

This may be my favorite one yet of the new stamps. This card turned a little shabby chic and I'm loving it.

The paper is from the Basic Gray line Lemonade and I really think I need to get some more of it. I inked everything up with my cat eye inks and distressing inks. Of course stickles on the headband and a little on her pinafore. She's colored with copic markers and I promise when I get more I will list the colors I use but for now I mix so much because I'm just starting out it wouldn't do anyone much good. The pink strip was punched with a Martha Stewart punch along both sides.


The flower is cut from Forever Young and my cricut with a pearl glued to the center. I tied a charm from the piece of ribbon and called her done.
I hope you like her as much as I do. I'm entering her in the following challenges

Magnolia Down Under - charms by April 30
PaperSundaes - 3 pp, 2 cs, 1 flower by April 28

Thank all of you for your lovely comments
Hugz
Tina

Don't forget about the Magnolia Image Swap. You can read all about it on the first post of my blog

Monday, April 26, 2010

Tilda with Bee

I colored another Tilda with a bee because I had this little log I had cut from my cricut and Pooh cart. I thought she'd be adorable sitting on it. It's not as fancy as some of my cards but I think it's nice enough.
I tore and inked the edges of my paper and faux stitched around them. The little flower is a metal brad from Karen Foster collection. The paper is from the Basic Gray Lemonade collection and Daisy D's.

I'm entering her in the following challenges

Simonsaysstamps - things with wings by April 28
BasicGray - Blue Gold, and white by April 30
CuteCard Thursday - sketch by April 29
Andrea's+Sketch.jpg

Stamptacular Sunday Challenge - Sew by May 1

Thanks for stopping by and all the lovely comments you've been leaving.
Hugz
Tina

Friday, April 23, 2010

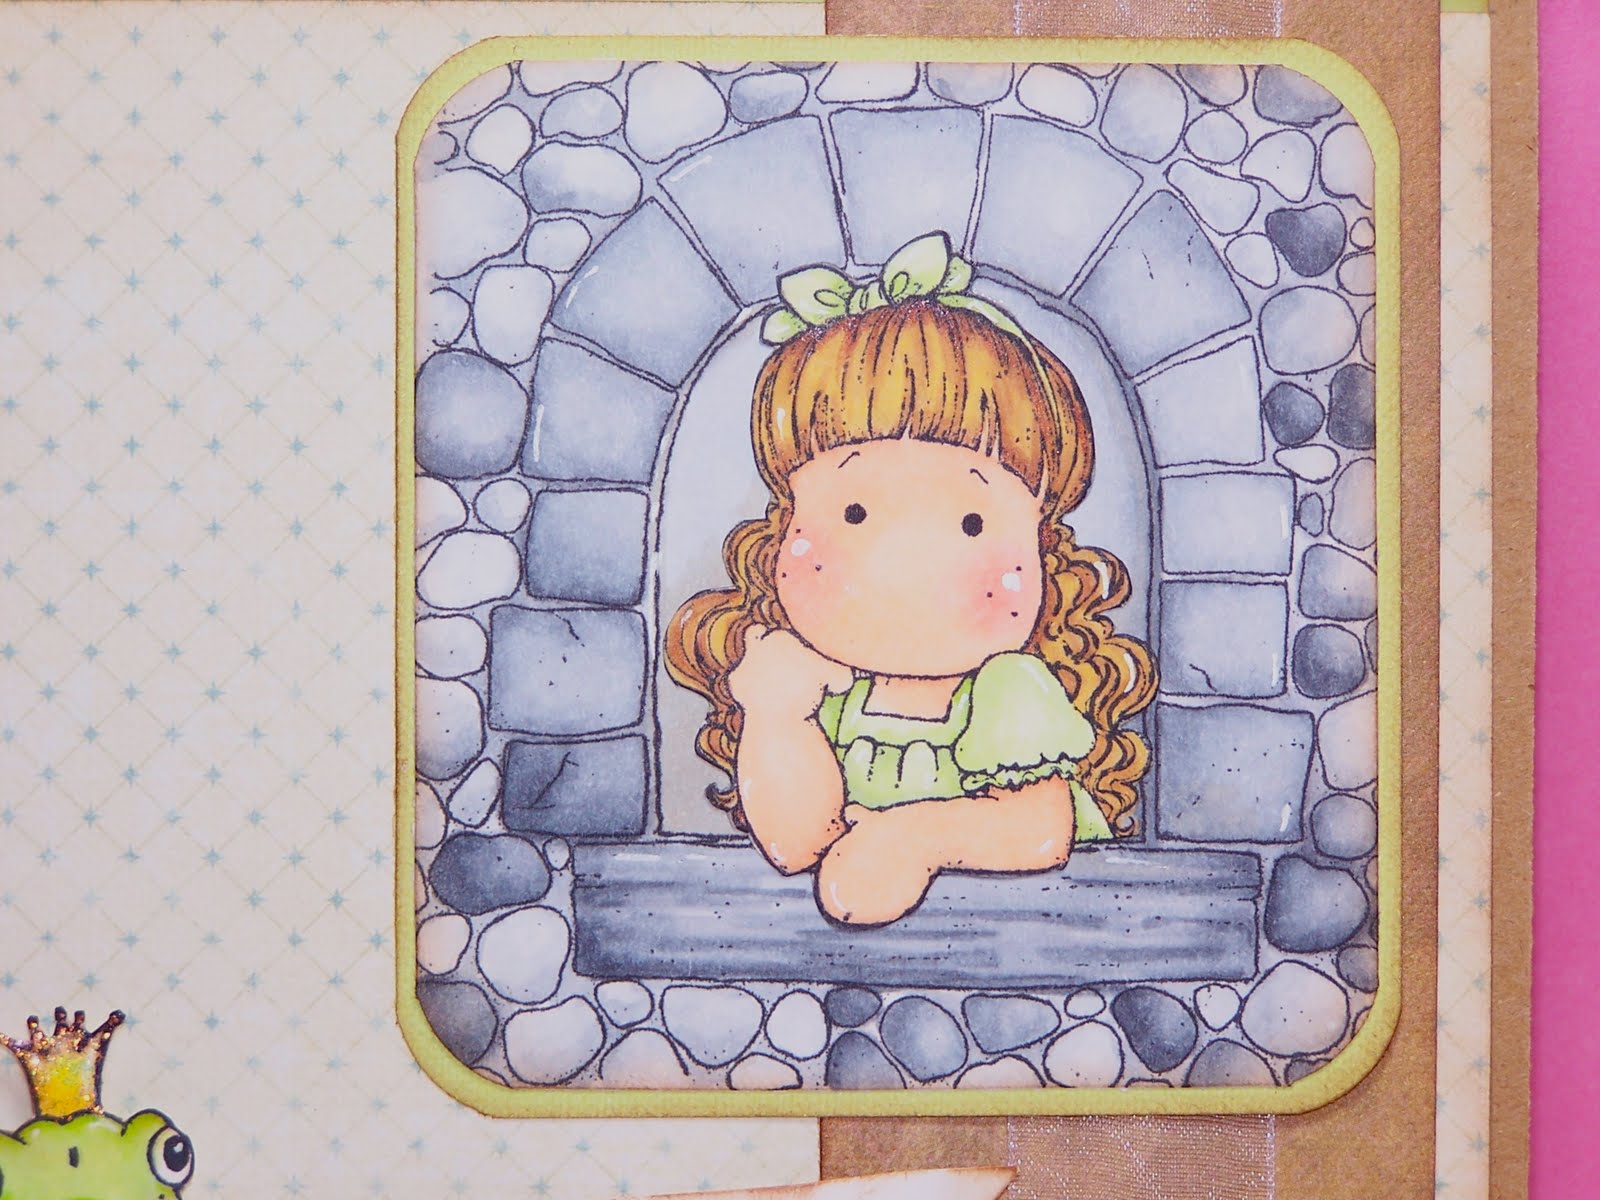
Tilda, Kiss Me I'm a Prince

What a fun, fun image to color! How could you resist this lil guy? Of course I'd kiss him!!

I colored all the images with my copics. I inked all the edges with my cat eye Chestnut Roan ink to give it an aged feel and of course I couldn't finish without a lil bit of stickles. LOL It added just that touch of bling to his adorable lil crown.


I kept the whole card fairly simple but I think it turned out adorable. I will be giving this to my hubby (my one and only prince) for my birthday. Yep I said my birthday. He gave me these wonderful stamps for my birthday so this is my thank you to him for always being my prince and making all my dreams come true. What a sweetie!!

Here's a close up of Miss Tilda. Isn't she adorable sitting there dreaming of her prince?


Don't forget if you're passionate about Tilda and Edwin to join us in our Magnolia image swap going on now. You can read all the details in a couple of posts down from here so check it out and join us. We have some adorable images (which ones aren't) that I can't wait to try out. I know my shopping list will blossom after this. LOL


Challenges
Magnolia Down Under - masking by Sat April 24
Just Magnolia - Anything Goes by April 30

Hugz
Tina

Wednesday, April 21, 2010

Lady Tilda


I've been having a great time coloring my new Magnolia images from the Spring Club. I absolutely love all the images but am bummed because I didn't receive the Tilda with apple. I've contacted Magnolia so hopefully they'll respond soon.

Well on to today's card. I colored her with my copics and added some bling with stickles. I used my cricut again for the following cuts;
scalloped oval - Storybook p.49 then embossed w/the cuttlebug
leaves - Joys of the Season p.68
flowers - Forever Young p.68
I really enjoy my cricut and it's great to be able to use them with my Magnolia stamps. If you haven't tried I encourage you to.

The pearls are from Queen & Co. The patterned paper is K&Co from my stash. I stitched it onto a piece of purple cardstock. The flowers and ribbon was distressed with Tim Holtz distressing ink. I wet the flowers then sculpted and dried them to shape I wanted.
On the inside of the card I used one of the dragonfly stamps and punched it out and then punched a scalloped circle to mat it with.

Don't forget if you're interested in swapping stamped images of Tilda and Edwin I invite you to check out my post here. We'd love to have you join. We already have some great images signed up so don't miss out. This is a great chance to try some images before you buy them. Let's face we know you will. LOL


The card is entered in the following challenges
Sir Stamp Alot - fantasy by Friday April 30
Critter Sketch Challenge - 10 items by Mon April 26
Peachy Keen Stamps Challenge 27 - color and inspiration image by May 2
Simon Says - Movies and embossing My fav movie is Enchanted
Cuttlebug Spot - Movies and embossing. again my movie is Enchanted
Bitten by the Bug 2 - stamped image and cricut cut by Tues April 27

Thanks for looking!

Tuesday, April 13, 2010

Bee-utiful Friend Tilda with bee


I made this bee-utiful card for a very bee-utiful friend. I've been wanting to try cutting some background images with my cricut to go with my Tildas for some time and thanks to Magnolia Stamp Lovers challenge I did it. I love how it turned out and have so many ideas running around in my head right now to try you wouldn't believe it.


On the inside of the card I stamped and colored the bee then glued a strip of pp along the bottom leaving a section free of adhesive. I then slipped the bookmark in.


Here are all the details for my card
Bee hive - cricut with Pooh & Friends cart
Sun - SU You are my Sunshine
Clouds - SU You are my Sunshine
Bee - Paper Company Studio Bugs & Butterflies
hello & friend - Fiskars Sentiment set
bee-utiful - Paper Company Studio Bugs & Butterflies

Bookmark Recipe
Quote - SU You are my Sunshine
Butterflies - SU Bunny Buddies
Flower Punch
Misc fibers

Copic markers - Y11, Y21, R81, R83, R85, E000, E00, E11, R20, B32, R00, B93, B97, E31, E33, E29, E53, C1, C3, C5, C7

Challenges entered
Magnolia Stamp Lovers - Create a scene by Sat April 17
Just Magnolia - Punch by thursday, April 16
Magnolia-licious Highlights - Sketch by April 30
Paper Sundaes - Scene Blog Hop Wed April 14

Thanks for stopping by
Have a blessed day

Tuesday, March 23, 2010

Thinking of You Tilda with Lilacs

Rhonda sent me some wonderful stamped Tilda's and I just had to get busy on this one. Thank you again Rhonda. The Tilda's with the long hair remind me so much of my daughter. They're just precious. Even though I don't have many copic markers yet I was able to do her completely with copics. I think this is the most elaborate I've ever made a card and don't have a clue how it's going to fit in an envelope. I guess I'll just have to keep her. LOL I made this one 6x6  but I think I'll do the next 5x5.


I crocheted the flowers while waiting for my daughter's guitar lesson. The cartouche is cut from the Sweethearts cart and the butterfly is cut from acetate using the Indie Art cart. The stamp is from Stampendous. I even dug out my sewing machine and stitched around my paper.

Challenges entered

Just Magnolia - Easle card and Magnolia stamp
Magnolia Down Under Challenge - Magnolia stamp
Magnolia-licious highlites - Acetate and Spring theme
Magnolia Stamp Lovers - Diecut
Paper Sundaes - Paper piecing
Bitten by Bug 2 - Spring, stamp, and cricut cut
Sophisticat Challenges - Mint green, lilac, and flowers
Simon Says Challenge - green
Creative Cottage Challenge - Flowers

Tuesday, March 16, 2010

Thinking of You Card


I've been really getting a lot done by doing challenges. Here are the challenges I completed.

I entered this card at Copic Creations  for their one year blogoversary.  We were supposed to choose a technique that we've learned this last year and they have some wonderful lessons. Since I've just started the technique I chose is combining Copics with colored pencils because they've really taught me how to use both until I can expand my copic collection more.

I did this adorable card for another challenge at the Critter Challenge Blog. We were to use green, yellow, and blue, and any flower. I chose this cute little turtle with the rose. All the paper is from my scrap bin. I am determined to dwindle it down and cards are a great way to do that.


Cute Daisy May Challenge: Anything Goes

And one more challenge to use the colors from nicoleheady's blog challenge. I chose Dawn McVey's color sample.

I sanded all the paper for a soft distressed look. The turtle was done using a digital stamp and some colored pencils as well as copic markers. Isn't he just plum cute?! I love the copic markers and added 3 more to my collection this week. I'm trying to use my 40% off coupons at Hobby Lobby and I bought some ciao markers at my LSS. They're a little cheaper and the same great quality!
The tag was stamped with Stampendous Friendly Messages stamp set and the ribbon is from the Karen Foster Mother collection.
I hope you enjoy my card and check out the Critter Challenge Blog to play along. Be sure and let me know if you do. I'd love to come check it out.
Have a blessed day

You're the Best Card


I did another challenge from the  critterchallengeblog today. It's a sketch challenge this time. I love working with sketches.

This is the sketch I worked from. I flipped the design but it's still the basic sketch.


And this is the card I made. I think she turned out adorable. I used my copic and colored pencils to color her. The flower is cut with my cricut and then shaped. I'll be making a video soon of how I did that. It's too fabulous not to share. The scalloped oval was cut with the cricut as well.


I also entered in stampinfortheweekend monocromatic challenge.

Thursday, February 25, 2010

Gone Fishing

Here is another adorable digi stamp from Treasure Box Designs. I think this little kitty is so cute. I had a lot of fun playing with him. As I promised these examples show the different effects you can get using colored pencils, copic markers, or a mixture of both. Remember if you ever want to see any of the photos on my blog close up to just click on them.


This first card I used all colored pencils and kept if light and pastel looking.

For this card I used my colored pencils and some stampin up markers for the kitty. I also used my SU markers to do some shadow effects.

For the last card I used SU markers and Copic markers. 

As you can see they're all cute just a little different so don't avoid working with digi stamps because you don't have the tools someone else does. Use what you have. If you want to invest in the Copic markers go for it and start off with a few color families and try them. They really are addicting. Or if you don't have anything and moneys an issue buy a set of colored pencils at Hobby Lobby or Michaels with a coupon of course and find your inner child. 

It is so relaxing and I love that I can  take my work with me and do it in the car or anywhere else when I'm waiting on my kids activities.

Have a blessed day and tell me about your digi stamps. I'd love to hear from you.